Tag Archives: Recipes

KingsfordFlavor, Cbias, Ad, Date Night, Grilling Recipes

Date Night for Two with Kingsford Original

 This shop has been compensated by Collective Bias, Inc. and its advertiser. All opinions are mine alone. #KingsfordFlavor #CollectiveBias

It’s hard to believe that it’s already July! The time has just flown by with get-togethers and trips leaving little time to just enjoy our surroundings and relax. One thing that we always say we’re going to do is stay home one night and cook dinner. Recently, I was at The Home Depot and saw the Kingsford Original Twinpack and decided it’s time to have that dinner.

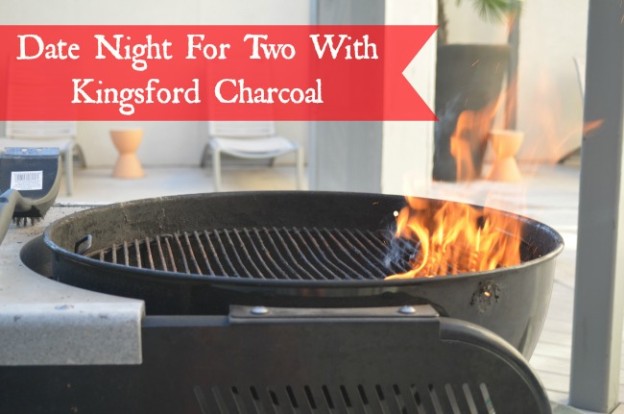
That sweet scent of the grill is the best. With the cooler night air, it’s nice to just take it easy outside with some home cooking. The Home Depot is currently running a special on the Kingsford Original Twinpack – 2 bags for $9.88!!! Found in the camping/outdoor grilling section (right as I walked in) and huge in-store displays. The price is great too as The Home Depot is currently running a special that has nearly cut the cost in half! (The timing is perfect for this holiday weekend!)

Kingsford-Original-7913a

Once I had the Kingsford Original charcoal, it was time to get the food in gear. We headed to the grocery store determined it was going to be our best, first home grilled dinner. We went home, ready to prepare delicious and easy portions to cook out. What’s great for cooking with charcoal is that you can take it essentially anywhere. A small grill in the back deck / patio or even venturing out to the park to enjoy the fresh air.

How to use the charcoal: If you’ve never grilled using charcoal before it’s incredibly easy. Place the briquets close together on the bottom of the grill (about 40 pieces). Light (with newspaper or lighter fluid) and let them burn for 10-15 minutes.  They’ll be ready for cooking once the they are lightly covered in ash and gray in color. Ensure this is done prior to any food being placed on the grill. (There are directions to reference on the back of the bag.)

Charcoal is great because it allows you to control the heat. We kept the charcoal mostly on one half of the grill for high heat and allowed the other half to have a bit of a lower temperature. This is dependent on what’s being placed on the grill. The following items were prepared ahead of time – easy preparation and transportation to the grill.

Gilled-Potatoes-Kingsford-1075a

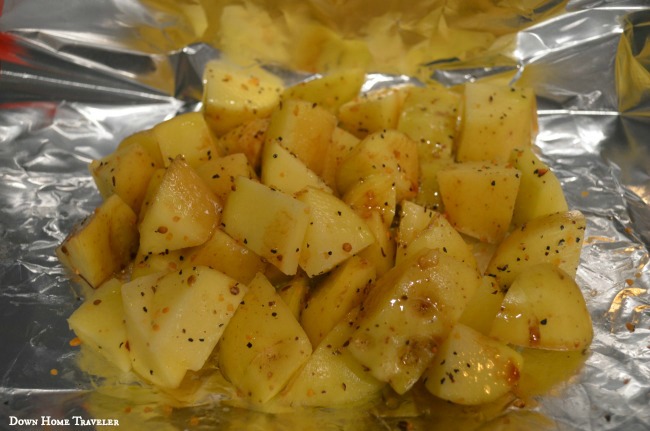
Grilled potatoes is one of my favorites.
1. Chop potatoes into small bite-sized portions (the smaller the size, the quicker they will cook). 2. Season evenly with Montreal Steak seasoning, olive oil, balsamic vinegar and a couple small scoops of butter on top.
3. Don’t be afraid to get your hands in there to mix them around. Wrap / seal in aluminum foil. These will take a little longer so be sure to throw these on the grill first.

Grilled-Veggies-Kingsford-1087a

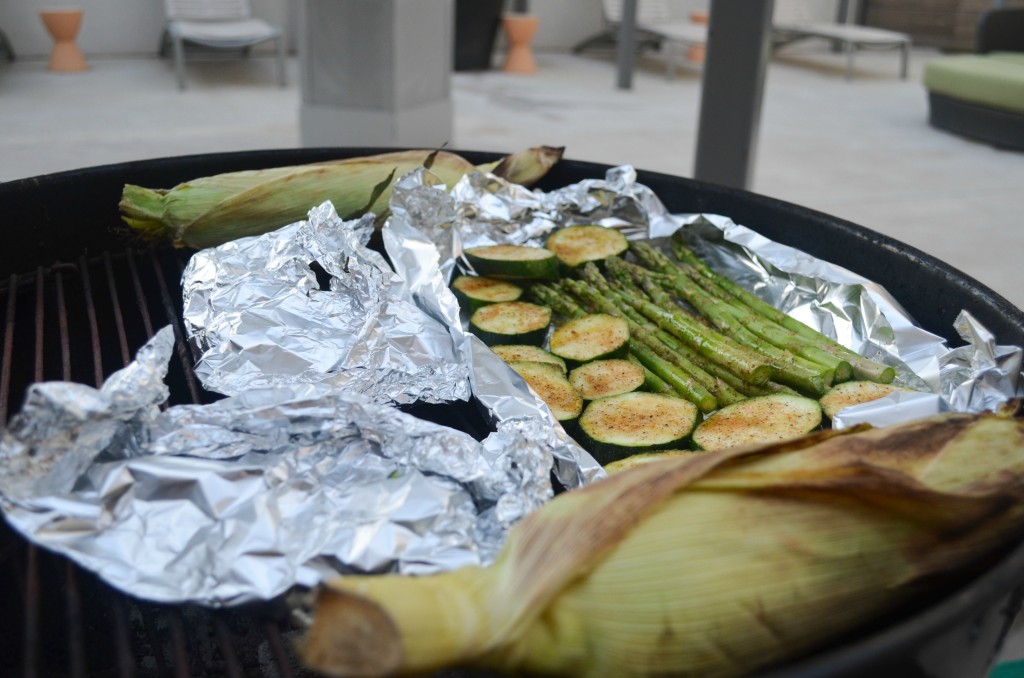
This grilled corn on the cob is also my favorite. Who am I kidding, I was all about the veggies! 1. Prior to placing the corn on the cob on the grill, soak in water for 10 minutes. This will prevent the corn from drying out (unless you’re going for popcorn). The corn will also take some time so place shortly after the potatoes and rotate frequently.
2. Check the corn by opening the husks and checking the tenderness. This will be the best corn you’ve ever had. Pretty sure, I surprised Spencer with this one. He loved it!

The grilled zucchini and asparagus were easy as well.
1. Slice, drizzle on the olive oil and sprinkle with season salt (on one side).
These will be the quickest items that we cooked so only give them 8-12 minutes so so. Ensure they’re rotated while on the grill.

Kingsford-Steak-1089

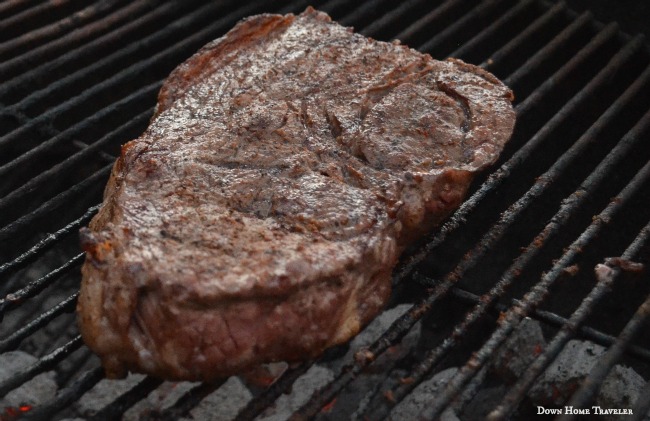
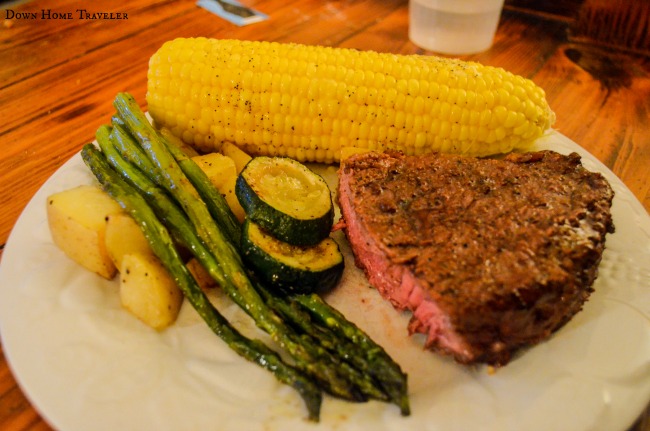
The steak! We picked up this great steak and it was really fit for two people. Seasoned with season salt and/or fajita seasoning and thrown right on the grill.
The tip to grilling steaks is to not touch them very often. Let them sit and cook to your preference on one side and flip. Remember, they’ll continue to cook once taken off the grill.
The best in our opinion is medium-rare, and Chef Spencer aced this one.

Grilled-Kingsford-1092a

This was the perfect date night for us after ending a busy weekend. Sometimes it’s nice and relaxing to just make the meal yourself and stay closer to home, enjoy your surroundings and the ones you are with. We’re already planning the next grilling night!

Are you now in the mood to grill? What’s your favorite grilled dish? Head on over to your nearest The Home Depot store to pick up Kingsford Original Twinpack. (Click here to find the store nearest you.)
Find more creative recipe inspirations here.

SNICKERS® Cheeseball & Football Candy Dish

This shop has been compensated by Collective Bias, Inc. and its advertiser. All opinions are mine alone. #BigGameTreats #CollectiveBias

CollectiveBias, Snickers, BigGameTreats, Recipe,

It’s hard to believe the Big Game is right around the corner! This is a pretty exciting time as get together are being planned as well as what dishes will be brought! Grilling meats, savory dips and #BigGameTreatsd will all be prepared in the days leading up to game day! Now it’s time to start preparing ourselves ensure we have that special dish to bring!

One of my favorite items are dips and the sweet and savory is one to please everyone. Usually for the big game, a few of us all get togther and bring a new dish. I was recently at Walmart and passed by the candy aisle and got a great idea, a SNICKERS® Cheeseball!

SNICKERS Cheeseball 7029

Cheeseballs are incredibly easy but also very flexible so you can mix in your favorite items and pair with various options for guests.

1. Mix the cream cheese, butter, confectionary sugaring and granulated sugar together until well blended. Fold in the chopped SNICKERS pieces and place in the refrigerator for between 2 hours to overnight. (To speed the process, place in the freezer for at least one hour.)

2. Take the mixture out and form into a ball. I used plastic wrap that helped to mold the shape very easily. Place the ball back into the refrigerator for one hour.

CollectiveBias, Snickers, BigGameTreats, Recipe,

3. At this point the ball should be firm but still a little flexible. Lay out a piece of wax paper and place the snickers pieces (food processor) down. Place the ball on top and roll on top until the entire ball is coated. Sprinkle and press the pieces onto the ball to get a thicker coating.


4. Plate and serve!

CollectiveBias, Snickers, BigGameTreats, Recipe,

This can be served with a variety of items, graham crackers, vanilla wafers or even fruit!

5.0 from 4 reviews
SNICKERS® Cheeseball
Recipe type: Dip
Ingredients
  • 1 8-oz. pkg. cream cheese, softened
  • ½ cup butter, slightly softened
  • ¾ cup confectionary sugar
  • 2 TBSP. granulated sugar
  • Around 3-4 SNICKERS Fun-sized bars, chopped (for inside of the ball)
  • Around 7 SNICKERS Fun-sized bars, ground in food processor (for outside crust of ball)
Directions
  1. Beat together cream cheese, butter, confectionary sugar and granulated sugar until creamy.
  2. Fold in chopped SNICKERS pieces (SNICKERS BITES would work as well). Use as much or little as desired.
  3. Place ball in refrigerator for 2 hours or overnight (to speed process, place in freezer for at least 1.5 hours).
  4. Remove from the refrigerator and shape into a ball. Wrap in plastic wrap and place back into the refrigerator for at least 1 hour.
  5. Remove and roll in the ground SNICKERS.
  6. Serve with graham crackers, crackers, vanilla wafers or fruit. (Options are endless!)
  7. ENJOY!


CollectiveBias, Snickers, BigGameTreats, Recipe,

Another way to prepare is to create this festive candy dish! This is great way to fill in a full buffet table and provides favorites for yourself and kids! Since we were in the candy aisle, we grabbed a bag of Skittles® for the event. Not including paint, this project cost less than $3 and is a great project for the kids while you are preparing the dip and fixings for the party!

Materials: Small pot with matching saucer, glass bowl (found at the Dollar Store), paint.
Directions:
1. Paint the pot and matching saucer as preferred. (I used paint that I had around the house.)
2. Once dry, place the pot upside down and place (or glue) the glass bowl to the bottom of the pot and place the upside down saucer on top as the lid.
3. When ready, fill with your favorite candies!

CollectiveBias, Snickers, BigGameTreats, Recipe,

CollectiveBias, Snickers, BigGameTreats, Recipe,


I’ve shared my game day dessert recipe with you! I’d love to hear what you plan on making for the Big Game! Leave a comment below.

Summer Grilling with Dr Pepper BBQ Sauce

This shop has been compensated by Collective Bias, Inc. and its advertiser. All opinions are mine alone. #CollectiveBias
For more ideas on how to create your own #BackyardBash, check out the tumblr page at www.drpepperbash.com.

#BackyardBash #Shop #Cbias #Recipe

Summer in Texas is usually unpleasantly hot however this past weekend the temperature was unheard of – a cool high of 82 degrees! PERFECTION!!! That only calls for as much time in the summer air as possible! I headed to Walmart and picked up everything I needed for a delicious Dr Pepper BBQ sauce and #BackyardBash!

#BackyardBash #Shop #Cbias

Friday night, I whipped up my Dr Pepper BBQ sauce (see below for the recipe). This recipe is super easy and definitely made for great grilling! Quick, flavorful and perfect for any event or preparation time. (This recipe was based on a recipe I found online however I made a few changes and it still turned out fantastic!)

#BackyardBash #Shop #Cbias #Recipe

Saturday was spent having fun outside!  First up – a little bocce ball and a lot of fresh air at the park! It’s so nice to be outside in Texas in July, and still see green!! It was super easy to grab everything in one swoop with my cooler and a small snack. Plus it wouldn’t be a Texas summer without Dr Pepper as it is the official drink of Texas!

#BackyardBash #Shop #Cbias

#BackyardBash #Shop #Cbias #BackyardBash #Shop #Cbias

Next up, it was time to try the Dr Pepper BBQ sauce and enjoy the grilling season. First, we coated the chicken with some of the sauce then placed the chicken on the grill. Throughout the cooking process, we coated the chicken with additional sauce to savor the flavor. Juicy with great flavors and spice enhanced by the one of a kind Dr Pepper flavor! #BackyardBash #Shop #Cbias #RecipeThe summer weather made it so nice to be outside enjoying the fresh air! The view wasn’t bad either!

#BackyardBash #Shop #Cbias#BackyardBash #Shop #Cbias

What’s your perfect way to spend a summer day? Do you have any fantastic Dr Pepper recipes?

Dr Pepper BBQ Sauce
Great on all meats or as a dipping sauce.
Serves: 3½ cups
Prep time: 
Cook time: 
Total time: 
Ingredients
  • 4 tablespoons (1/2 stick) butter (I used salted)
  • 1 large yellow onion, chopped
  • 2 tsp minced garlic
  • 1 cup ketchup
  • 3 Tbsp tomato paste
  • One 12-ounce can Dr. Pepper
  • ½ cup cider vinegar
  • ⅓ cup Worcestershire sauce
  • ½ cup packed light brown sugar
  • 2 tsp chili powder
  • 1 tsp black pepper
  • 1 tsp salt
Directions
  1. In a large saucepan, melt butter.
  2. Add chopped onions and garlic. Saute until onions are translucent. (About 10 minutes.)
  3. Whisk all remaining ingredients in a bowl, add to saucepan. Bring to a boil for about 10 minutes. (Stir occasionally to avoid sticking.)
  4. Simmer under a slow boil for 30 minutes. The sauce will begin to thicken. Stir occasionally. Seasonings may be adjusted per taste.
  5. Remove from heat to allow to cool for 10 minutes (or until warm but not boiling hot.)
  6. Puree with blender. This will thicken the sauce.
  7. Let cool.
  8. Keep tightly sealed in the refrigerator for up to two weeks.